The error message “Unexpected error – (11101) 425 Unable to build data connection: Connection timed out” often occurs during a cloud backup in Embla Norwegian Family History and is commonly caused by Windows Defender Firewall or another firewall on your PC blocking the application’s network connection.
Solution: Adjusting Firewall Settings
To resolve this, you can adjust your firewall settings to allow Embla Family History to function properly. Follow these steps:
Search for Windows Defender Firewall
1. Click on the Windows icon in the taskbar of your PC to open the Start menu.

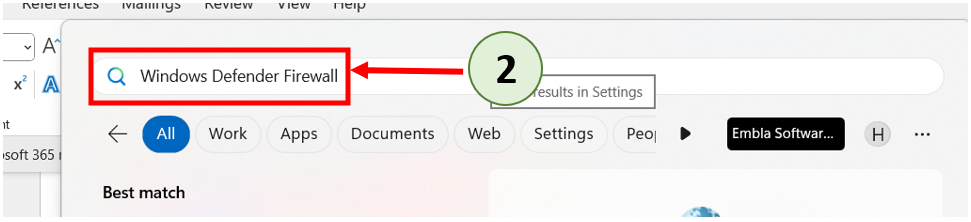
2. In the search bar, type “Windows Defender Firewall” and press Enter.
Open Windows Defender Firewall Settings
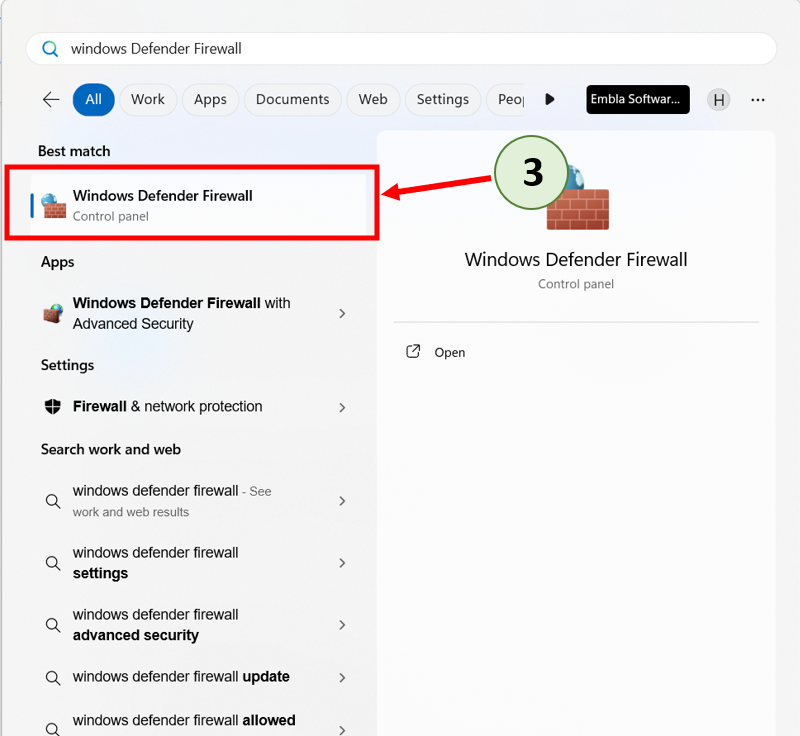
3. From the search results, select “Windows Defender Firewall”. It should look similar to the image below:
Access the Allowed Apps Section
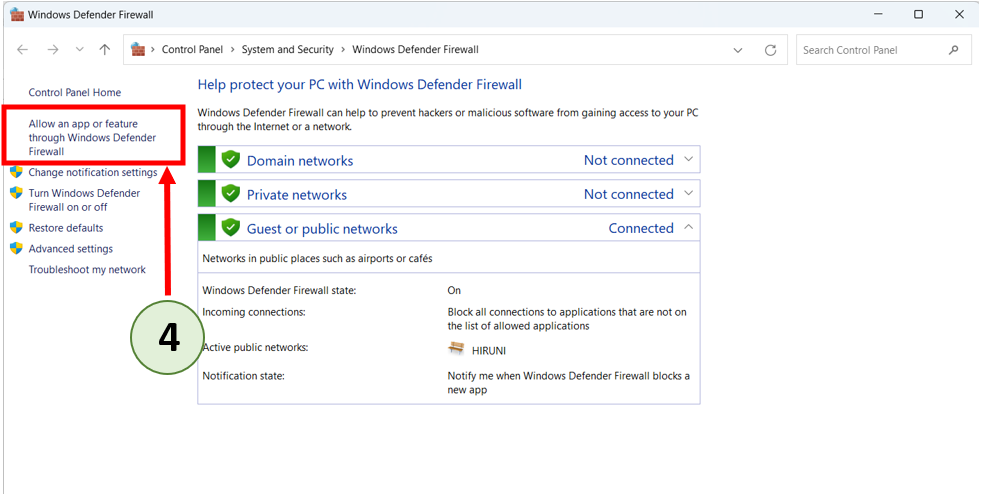
4. In the Windows Defender Firewall window, click on the link labelled “Allow an app or feature through Windows Defender Firewall”.
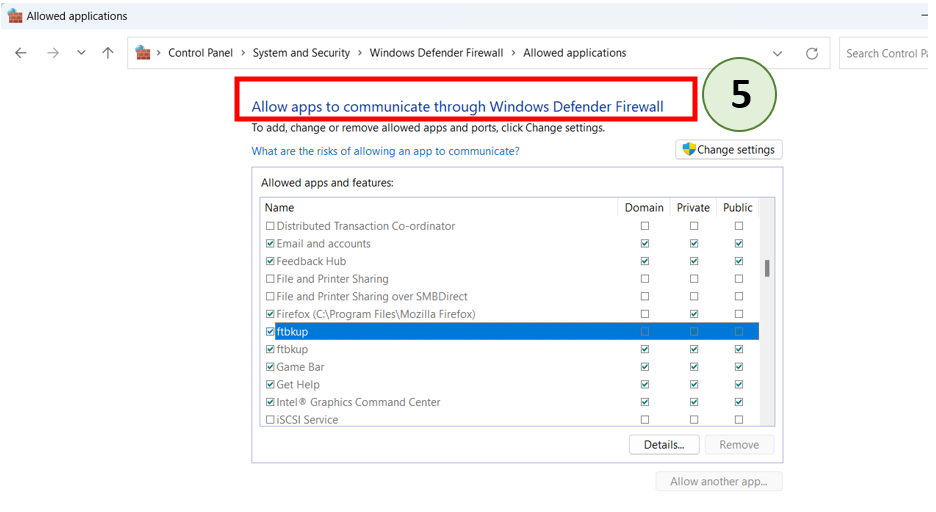
5. This will redirect you to the “Allow apps to communicate through Windows Defender Firewall” section, where you can adjust the settings as needed.
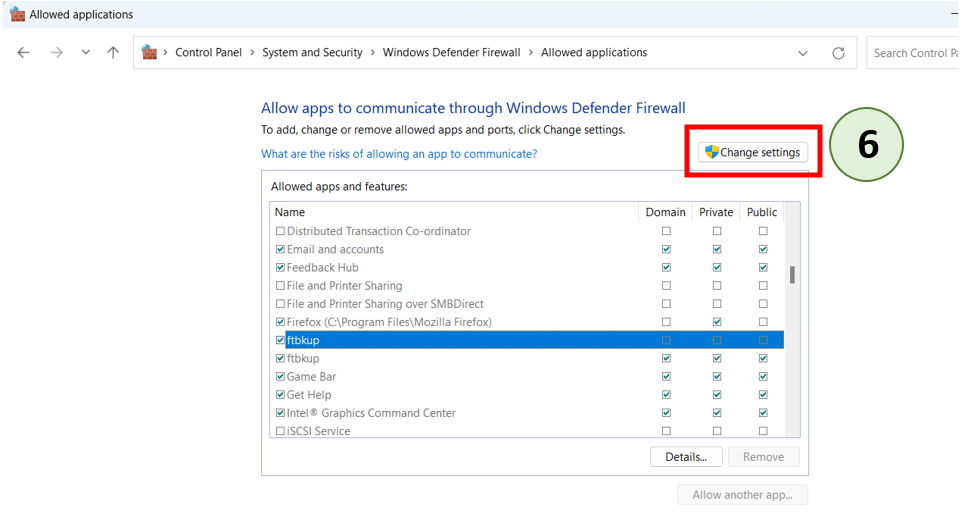
Click on the “Change Settings” Button
6. Once you’re in the Windows Defender Firewall window, click on the “Change settings” button to allow modifications to the firewall settings. This will enable you to make changes to the list of allowed applications.
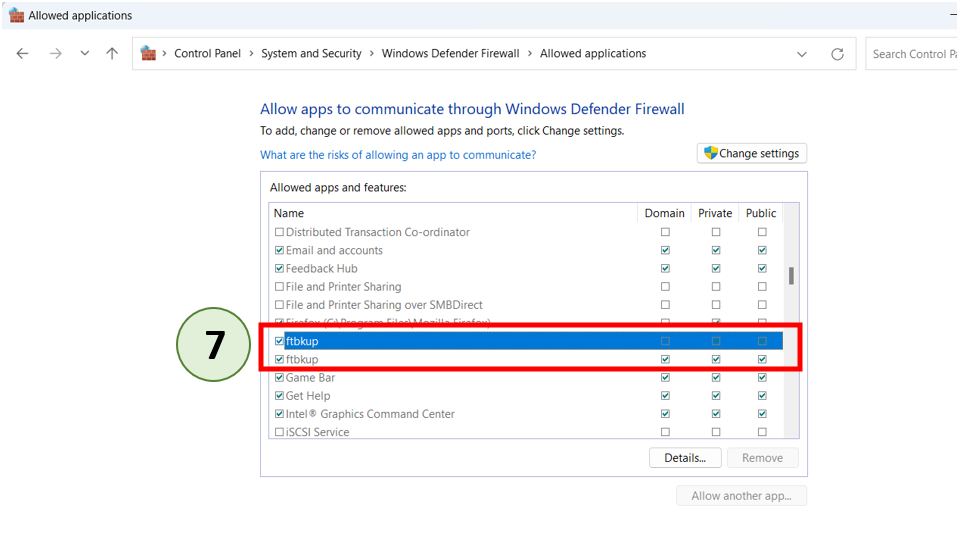
Find ftbkup in the “List of Allowed Applications”
7. Scroll through the list of applications until you find ftbkup.
(This is the application you need to adjust to ensure it’s not being blocked by the firewall.)
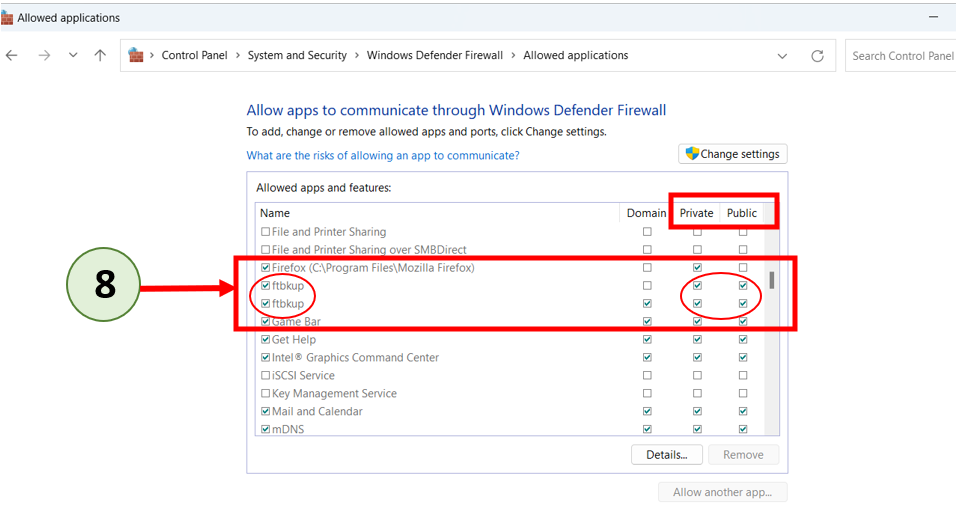
Check the Relevant Checkboxes
8. Ensure the checkboxes near “ftbkup” are checked. (You can do this by clicking on the checkbox to place a tick mark).
Also, ensure the checkboxes under both Private and Public networks related to ftbkup are checked. (You can do this by clicking on the checkbox to place a tick mark).
This allows the application to function properly on both private and public networks.
(Note: The image below shows the correct way of ticking the checkboxes. Ensure both the Private and Public network checkboxes are marked correctly for ftbkup.)
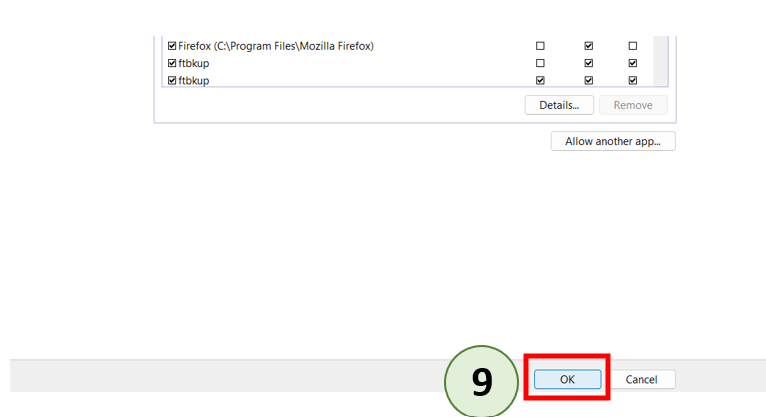
Save the Changes
9. Once you have confirmed that the checkboxes are correctly checked, click the “Ok” button to save the changes you have made to the firewall settings.
By following this guide, you can ensure that ftbkup (Embla version 9) has the necessary permissions to work seamlessly.
Leave a Reply